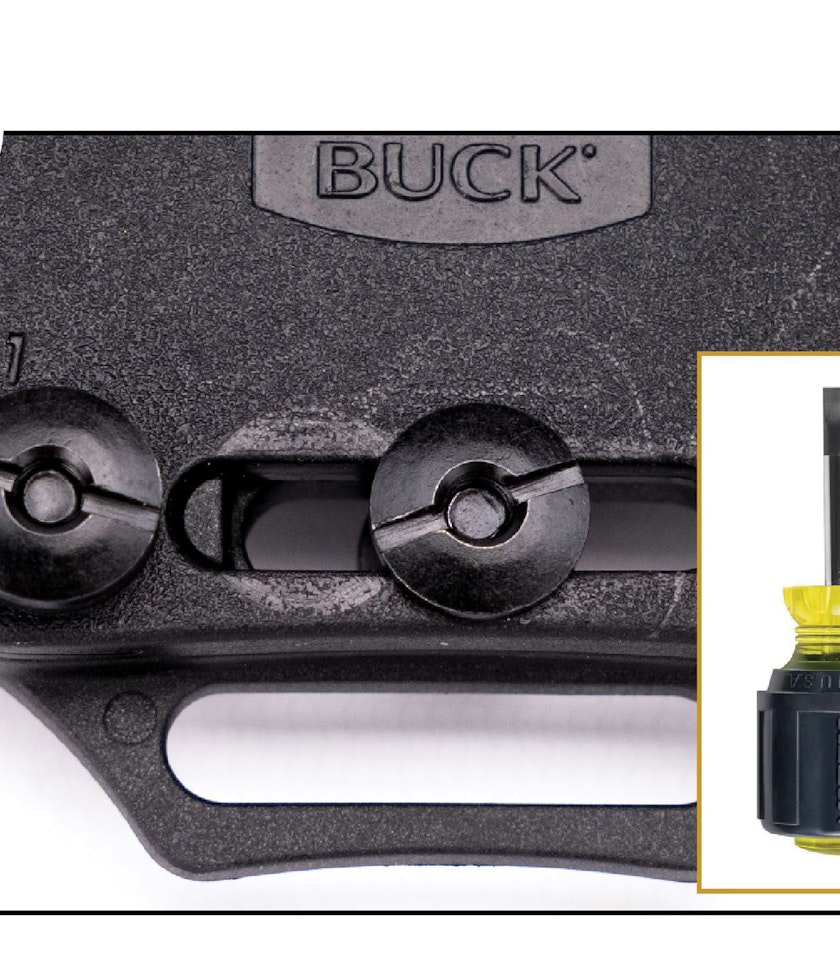
Handle with care, these materials scuff easily. Use hand tightening and loosening when possible. A screw driver is required for final tightening on all fasteners.
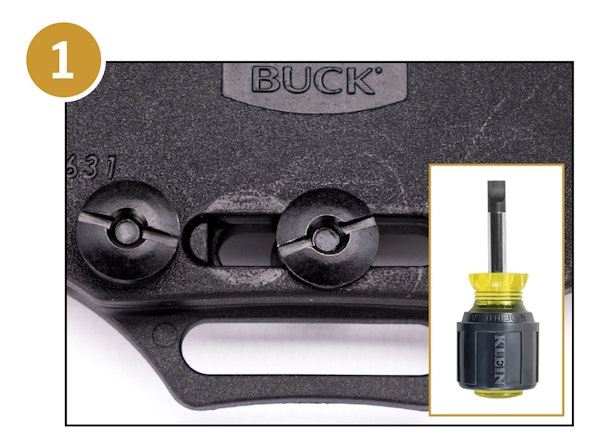
Locate and organize the 3 sub-assembly components at your workstation.
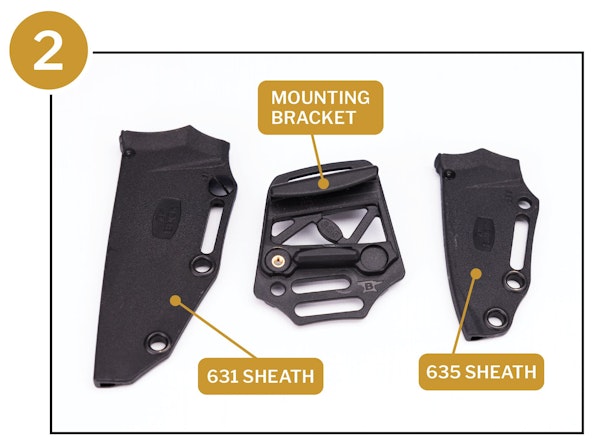
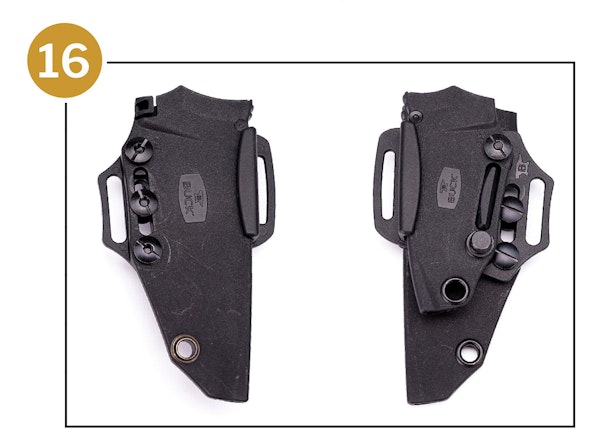
Place the mounting bracket with the 635 side up and locate the thumb screw and 2 fasteners attached to the bracket.
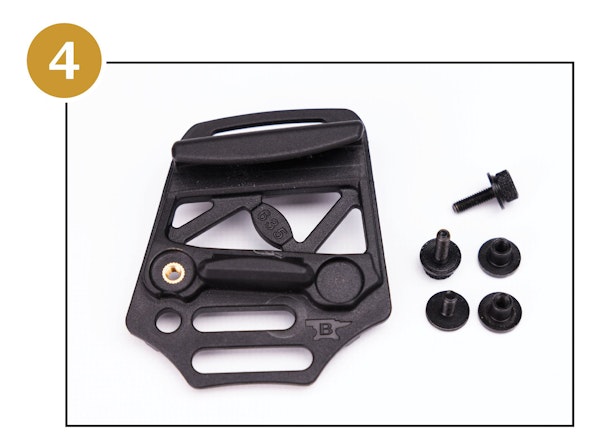
Carefully remove (preferably by hand) the thumb screw and both fasteners from the mounting bracket.
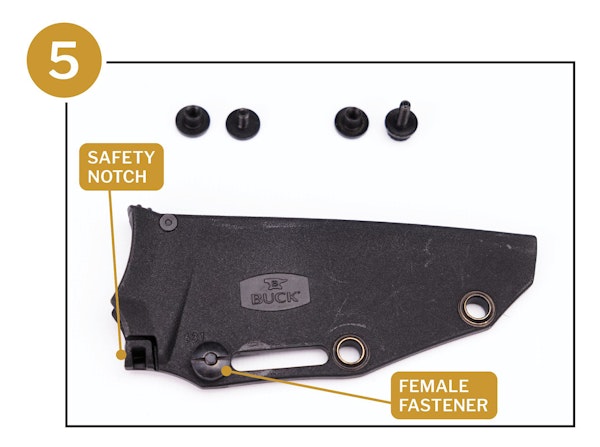
Now move to the larger 631 sheath. You will need to unscrew and flip the fastener so the female side is on the same side as the safety notch and tighten it down.
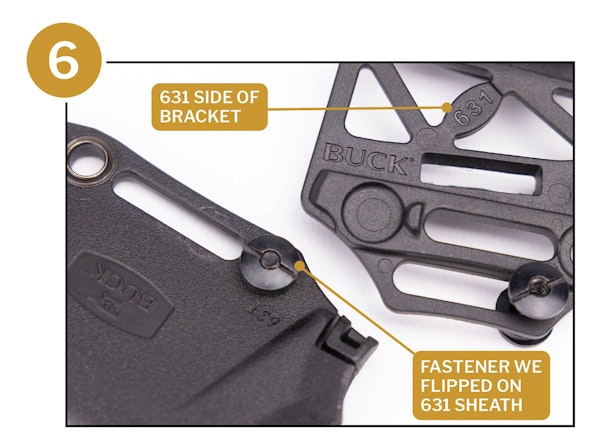
Flip the mounting bracket over to the 631 side. Identify the recess cavity. This is where the fastener we just flipped will snap into.
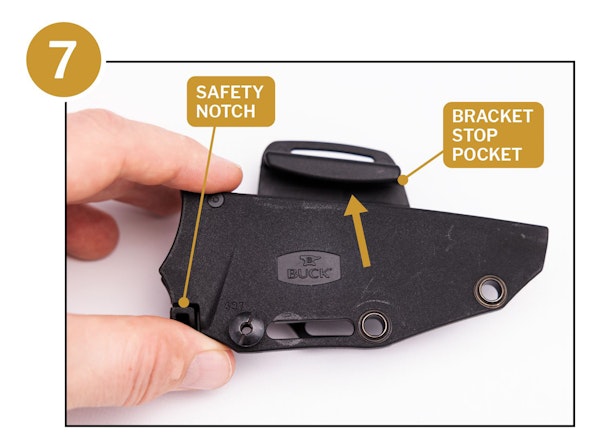
With the safety notch facing up, slide the sheath into the stop at the end of the mounting bracket.
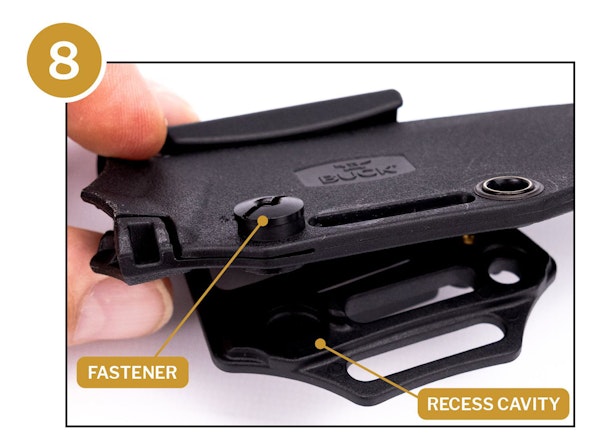
Match the fastener in the sheath to the recess cavity in the bracket and push them together; you should feel them snap in place.
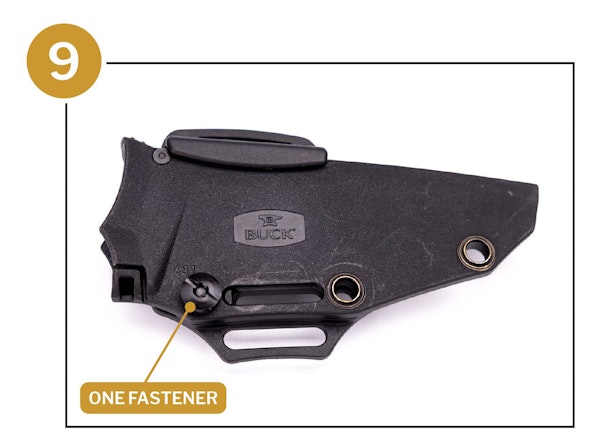
The sheath at this point should have 1 fastener installed and be attached to the mounting bracket.
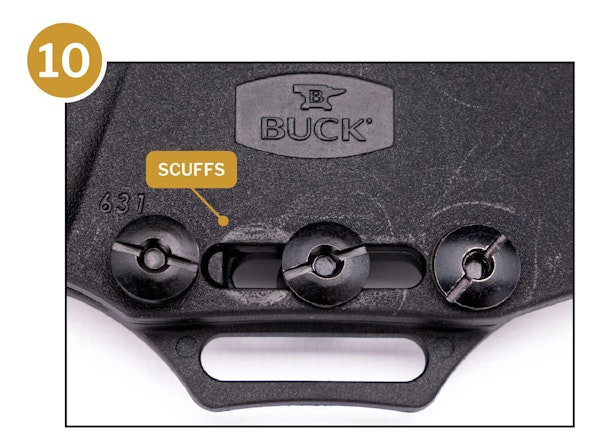
You are going to install 2 more fasteners, but be careful to avoid sliding the fastener in the slot before tightening down, it will create scuffs as seen above.
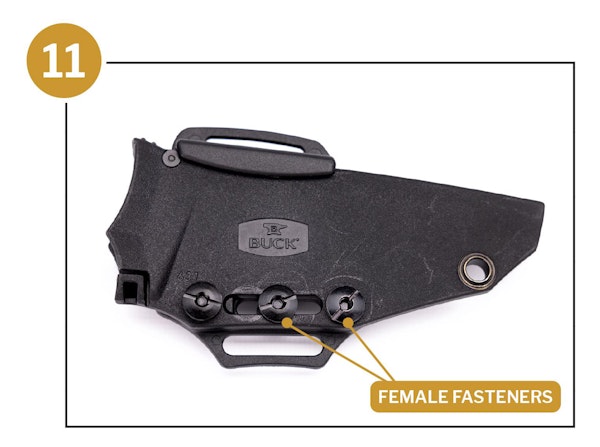
Use the fasteners you took off the mounting bracket earlier and install 1 fastener with female side up in the center of the slide area. Install another fastener in the hole to the right of the slide (seen above), also female side up.
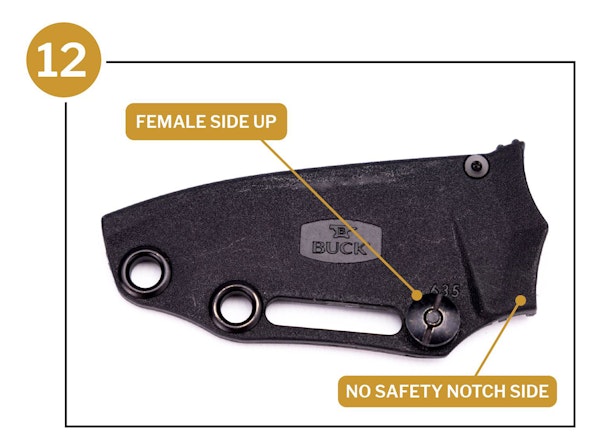
Now locate the 635 sheath and ensure the female side is up on the non-safety notch side.
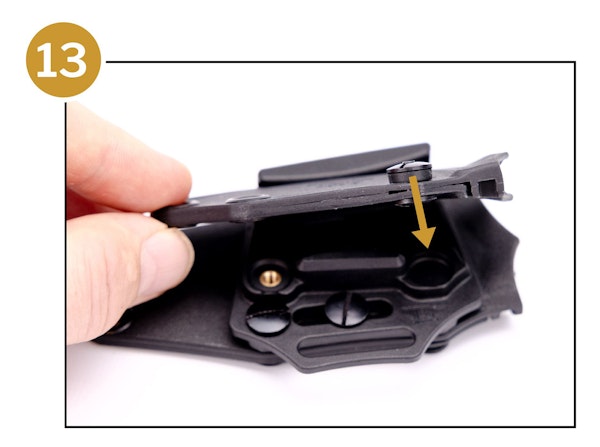
Same as step 7, slide the sheath back to the stop plate. Then close, lining up the fastener and cavity. The 635 also has a through plate that lines up and will show through the sheath when clicked down.
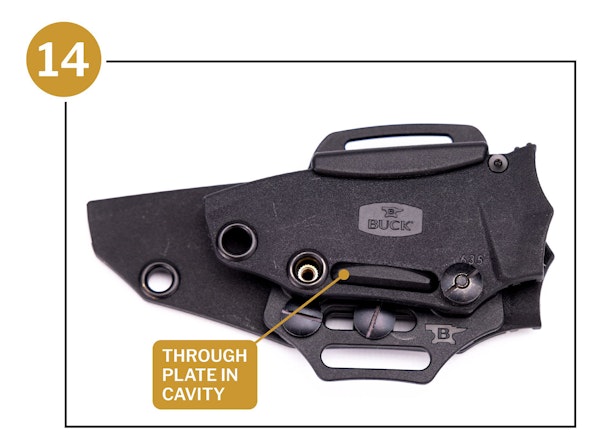
The 635 sheath should sit flush on the mounting bracket and have the through plate exposed.
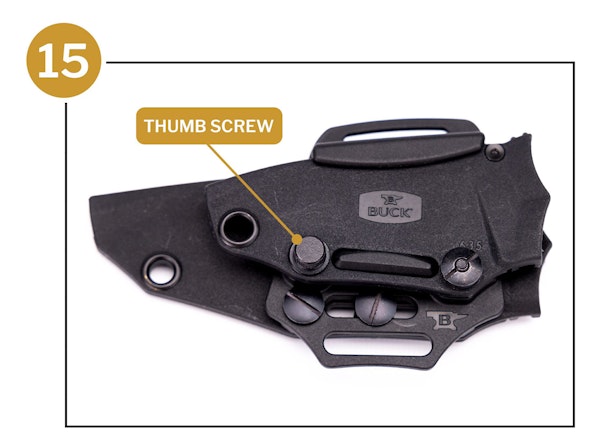
You can now install the last thumb screw to the left of the through plate.
Inspect your work to ensure all fasteners are secure.